Installing vinyl planks flooring around toilet

Installing vinyl planks flooring around toilet

Today we are going to install vinyl planks in our bathrooms.
We have dated bathrooms with linoleum flooring and we absolutely hate it.
We have looked into different materials and ruled out tiles as we wanted to create a warmer feeling to the room. This house is located in rainy Pacific North West. I think we can all use some warmth.
Let’s go over the tools I’ve used for the project that I picked up from Amazon and Homedepot, I have them linked in the description section if you would like to find links for them.
First and foremost, the flooring material. After looking around a few different brands and colors, I’ve ended up with using Lifeproof 8.7 inch wide Click Lock Luxury Vinyl Planks. I’ve chosen 8.7 inches to minimize the number of boards to install. Remember, the bigger the planks, the fewer boards you will need to install. Hopefully wide plank flooring will stay in fashion for a foreseeable future.

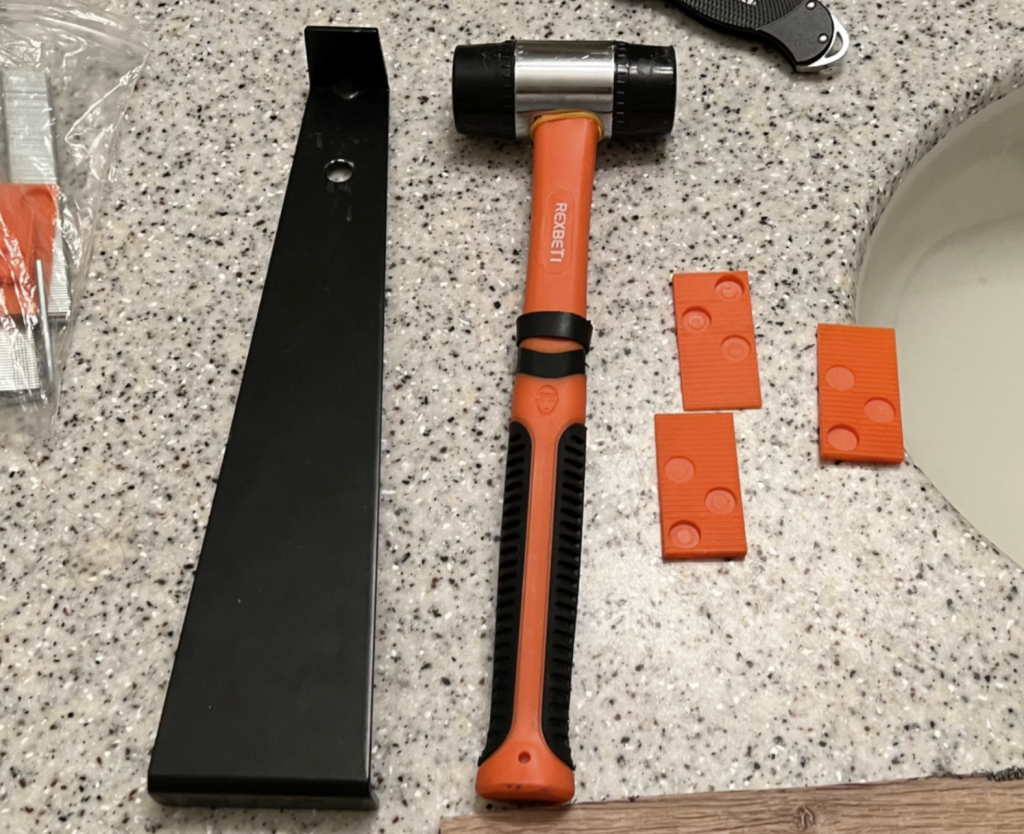
Next, I purchased REXBETI 43-Piece Upgraded Laminate Wood Flooring Installation Kit with Solid Tapping Block, Long and Wider Pull Bar, Diameter 1 9/16″ Reinforced Double-Faced Mallet and 40 Spacers. Wow that was a long name. This package contained basically a mallet and tapping block that leaves less impact scars, 40 spacers to keep the space between the boards and the wall, and pull bars to make the hammering to close the gaps between floor planks more easily.
Then we need tools to cut the boards in shapes we need. If you are lucky and your room is a perfect rectangular shape, then you can get by with using a box cutter. During the installation video, I will show you how to use the box cutter to cut the planks easily.
Unfortunately for us the room had some odd shaped spots like the toilet, the vanity and a part of the wall that stood out.
Quick side bar, if you are comfortable with removing toilets and vanities, I would strongly recommend that you do that before you install the floor. For our home, unfortunately there was no in-house water control bib and I was afraid that I may mess up the water pipes and not be able to stop the water. Also since this was all happening during holiday times, I didn’t want to call in plumbers to help with the removal and decided to go ahead with flooring with the vanity and toilet in place.
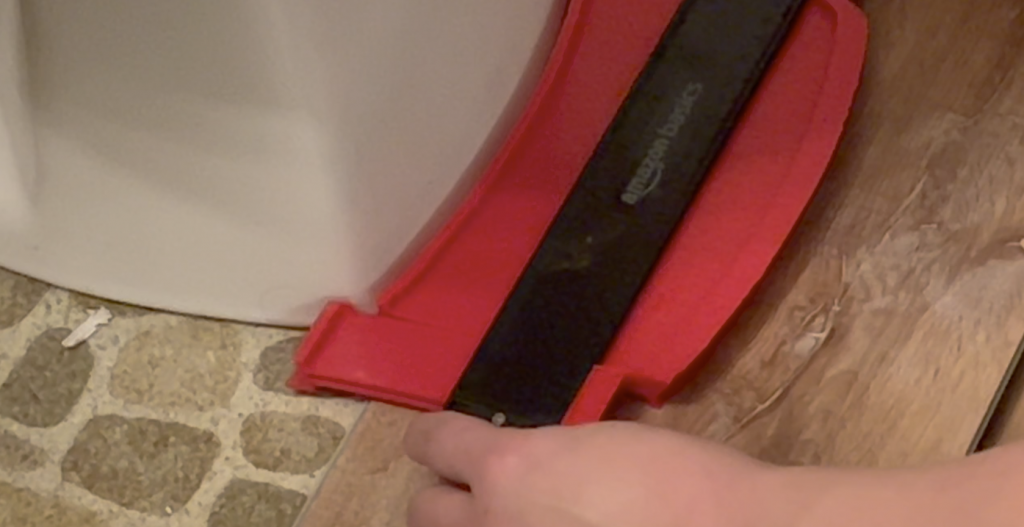
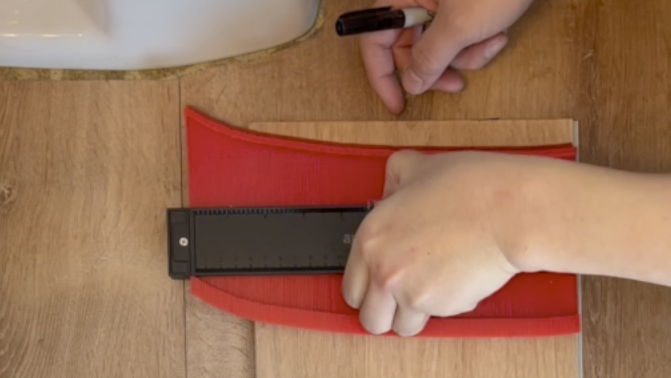
This did create an interesting challenge for me where I had to additionally purchase Amazon Basics Contour Gauge Set, 5-Inch and 10-Inch Profile. This little gizmo helped me so much in tracing the hard to measure non rigid contours of the toilet. I first attempted to eye ball it with some adhoc tracers w/o out the contour gauge and wasted a few planks. To see how I used the gauge, please continue watching the video.
Amazon Basics Contour Gauge Set, 5-Inch and 10-Inch Profile
For this contours and walls that stood out, I chose corded BLACK and DECKER Jig Saw. There are a few choices on this as well, but I basically went for the cheapest jig saw that seemed to come from a reputable brand. You can probably get a wireless version of this tool as well but I personally did not see my self using this away from the work bench, and the cord did not get in the way. It is also pretty darn difficult to accidentally cut the cord with the saw as well.
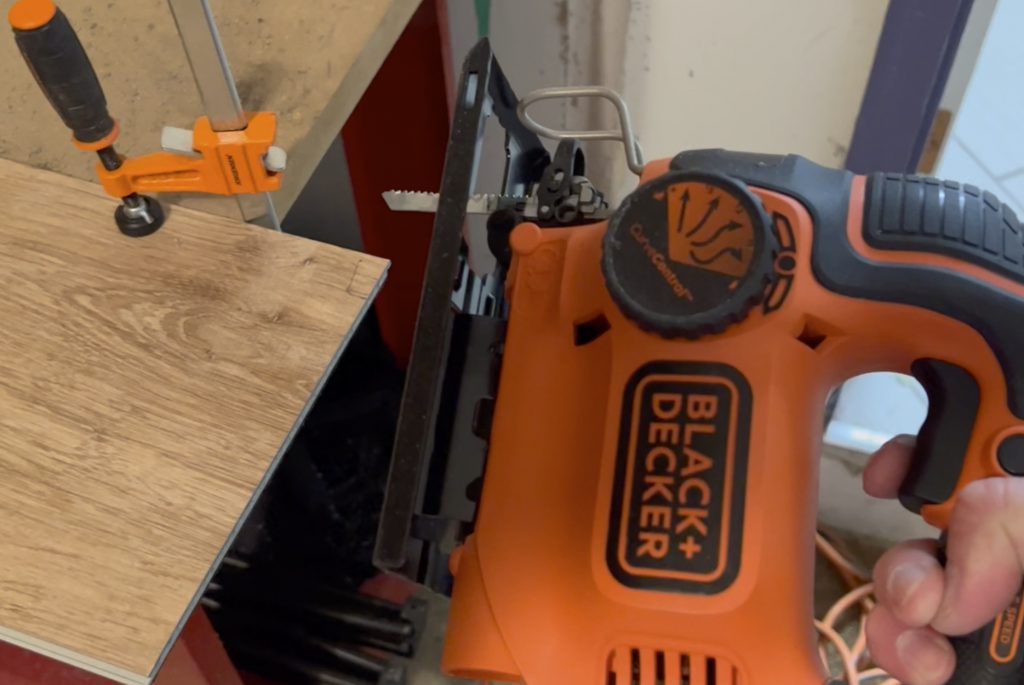
BLACK+DECKER Jig Saw, Smart Select, 5.0-Amp (BDEJS600C)
And lastly, I had to buy Jorgensen 2-Piece Steel Bar Clamp Set, Light Duty F-Clamp, 8-inch & 12-inch to hold down the planks while cutting it with the jig saw. The jig saw blade oscillates so rapidly, the plank needs to be clamped down at least from two points on the work bench.
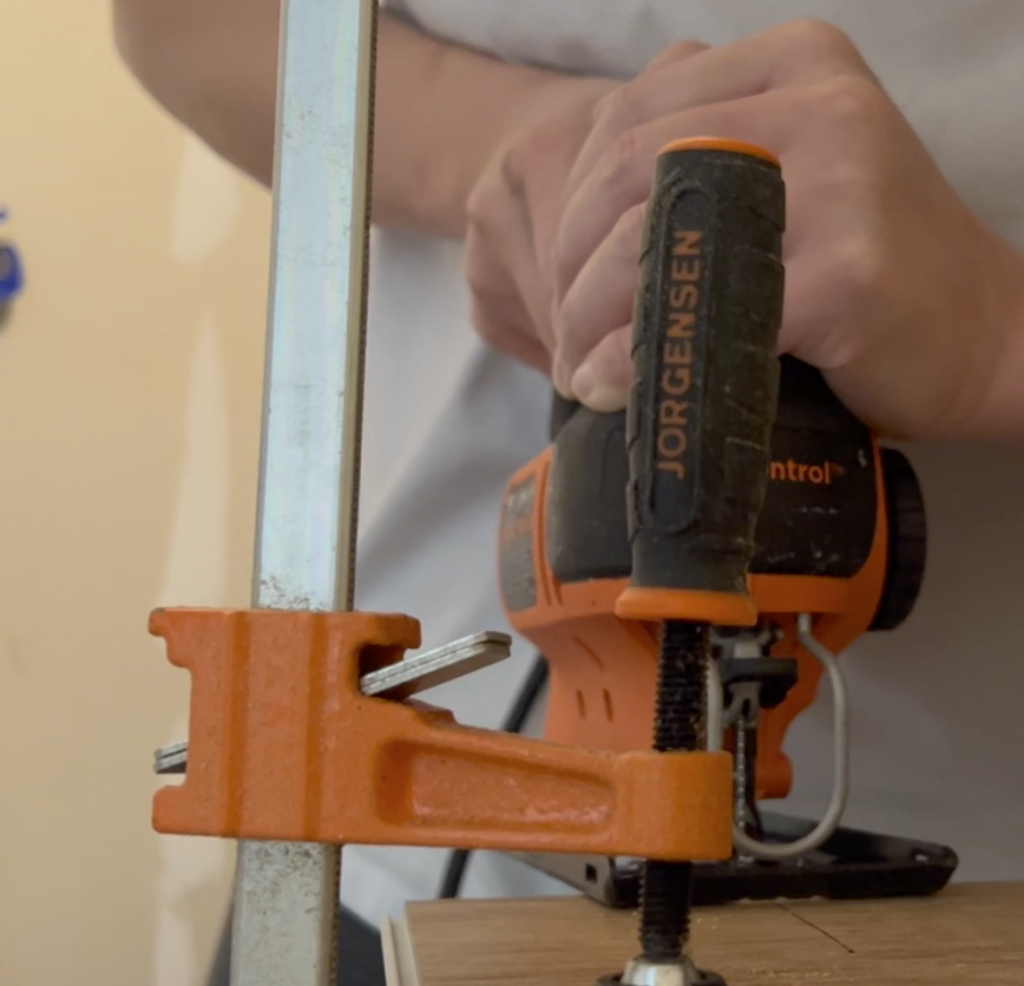
Jorgensen 2-Piece Steel Bar Clamp Set, Light Duty F-Clamp, 8-inch & 12-inch
Oh and I lied, I also had to buy some finishing materials for the transitions and shoe molding, but I will create a separate video on these. Please check out my channel for this video as well.
After spending all this money on the tools, there was no coming back and I got straight to work.
First thing you need to do is making sure that you have enough boxes to cover the area. One box of Lifeproof covers 20.06square feet per case. I bought 3 boxes, just in case if I made mistakes and wasted the planks. Homedepot is amazing with its customer service, you can return your unused materials after you are done with the project as long as it was not opened. So I decided to buy an extra box to save the trip.
Once you open the box, there is an instruction manual on how to install the box. The key take away for me was that you do not want planks shorter than 8 inches for stability.
With that in mind, I started to laying out the planks on the floor, thinking about how to lay them out naturally with minimizing cutting of the planks.
For these click and lock planks, once a board is cut and looses it clickable edges, it’s only usable to face the beginning or the ending of the strip. So your goal here is an optimization of cutting the fewest planks arranging the planks in natural looking staggering order. At first I started to lay them out in 3 step ordering but then I got lazy and just used 2 step ordering and repeating the stagger. The room was small so this did not create a noticable problem. As my channel name says it, it’s good enough!
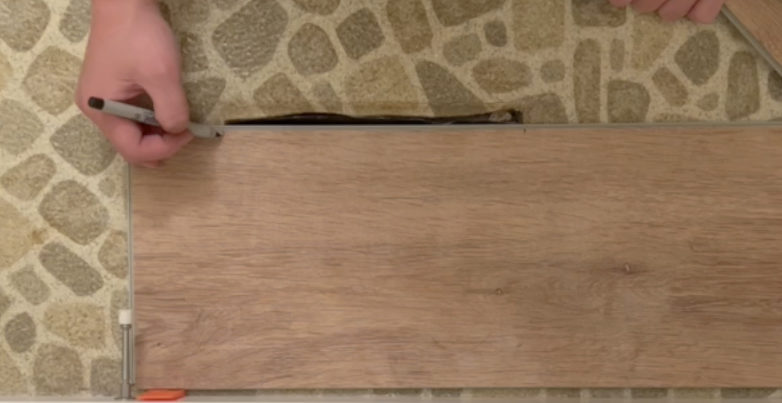
After you decide on the staggering plan, start your first board by finding the most straight and visible wall to use as your starting point. Here I placed the spacers on the wall and laid my very first plank.
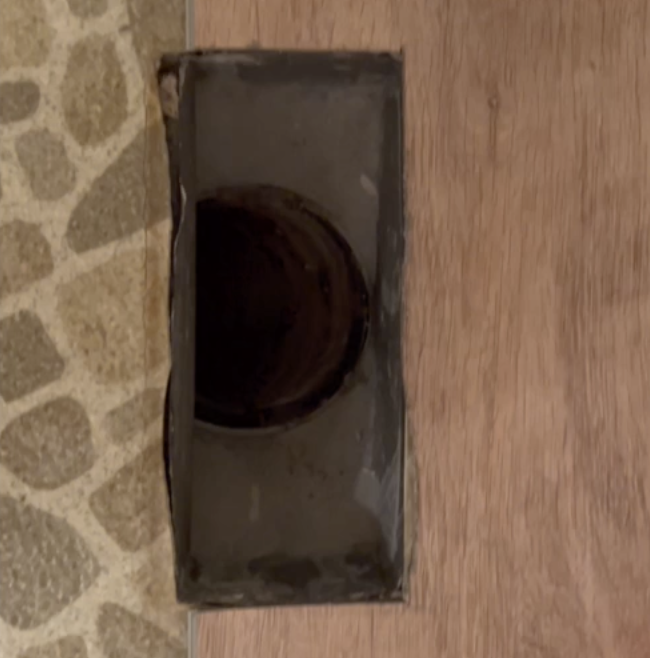
Then I had to cut out a hole to fit the air vent fixture. Jig saw was the tool that I needed here. After making the marking on the board, I took it to the workbench, clamped the board down and cut out the marked area. Small tip on jig saw curve turning, you can cut into a small foot hold first, then turn your jig saw at the corder from this foot hold point.
And it fit perfectly!
After laying the first board, I used the contour gauge to trace the door frame. I’ve seen videos where people would cut the door frame at the height of the flooring board and slide it under for a cleaner look. But I didn’t want to buy yet another saw and also create a non reversible cut on the door frame. So as I call it, cutting against the contour was good enough for me.
I left enough space between the carpet and the plank to install a transition, which we will get to in the next video. Please check it out as well.
After this point, worked in reverse. Installed the next full plank on the edge I just finished then continued back toward where I started. Here I measured the length I needed and used the box cutter to cut the plank.
Once you draw in the line where you want to cut the plank, get a sturdy ruler or straight guide and cut over the plank a few times with firm press. Then just snap the board and that’s it!
As you lay down more boards, use the mallet, tapping block and pull bar to close the gaps between the boards.
Now I’ve reached the most challenging part; the dreaded toilet. It is hard to get this exactly, but by using the contour gauge, you can map the toilet’s shape onto a board and use the jig saw the cut out the contour. Here I intentionally made the shapes as tight as possible and made a few more adjustments after attempting to place the board against toilet. Once you cut away too much, there is no putting them back, but if you cut it too tight, you can always cut more.
Don’t stress over it too much and feel free to practice a little with some of the scraps you may have built up by this point.
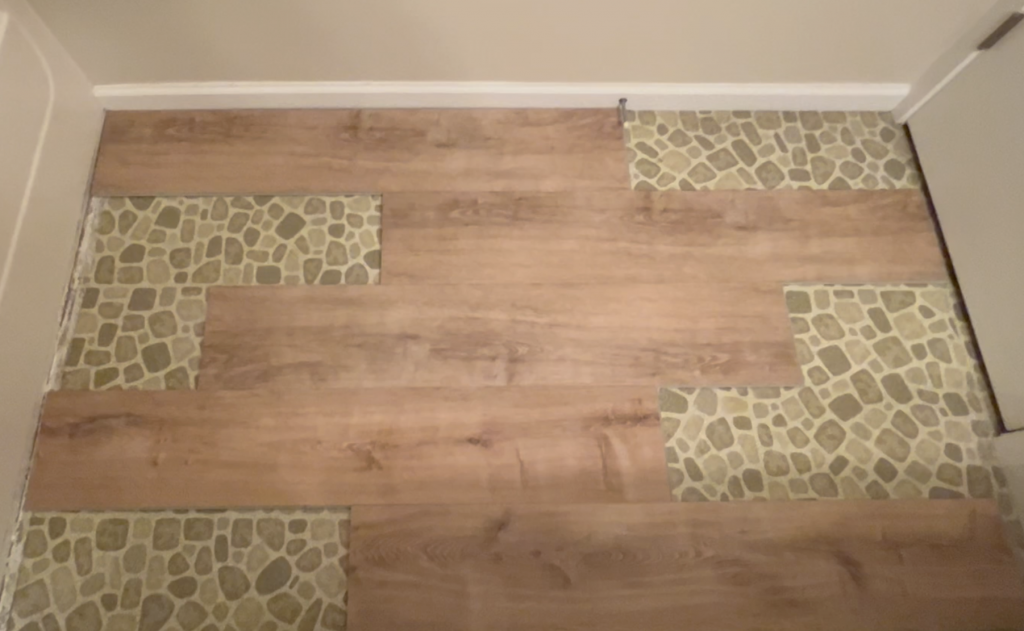
And here I am! covering the entire floor!
These gaps look hecka ugly, but we will cover them with shoe molding in the next video.
One thing to notice here is that I was left with a tiny 2 inch sliver. I could have started with a half width plank in the beginning to avoid this, but I didn’t want the first row to start off w/ non straight line. Since this is such small part of the back of the bathroom, I think pinning it down with shoe molding to hold them in place would be good enough!
You can watch the whole thing as a video at my youtube channel as well.
Tools used
Amazon Basics Contour Gauge Set, 5-Inch and 10-Inch Profile
Jorgensen 2-Piece Steel Bar Clamp Set, Light Duty F-Clamp, 8-inch & 12-inch